When deciding on whether to hire a makeup artist to do my wedding day makeup or not, I chose to go the DIY route and acquired an airbrush machine instead. My makeup skills came mainly from experience and watching a lot of youtube gurus. I was quite comfortable in doing my own makeup and especially since I'm asian, I'm not so fond of allowing anyone who doesn't specialize in asian makeup to put my face on for such an important day -- I'm also the same way with my hair, no pun intended.
Naturally, doing makeup became another hobby of mine. I had a chance to play 'makeup artist' for a family's wedding last year and I just wanted to show you some of the before and after photos trial run that I captured. (I had to plead a great case in order to show these photos online :) Thanks ladies!)
I forgot to take the photo before I did her foundation and eyebrows. The before photo (left) show the airbrush foundation in natural light. The after photo (right) shows the finishing look with the built-in flash.

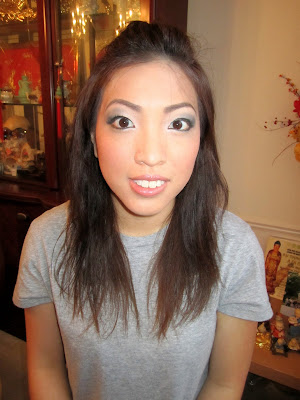
In this and before (left natural lighting) and after (right natural lighting), I was able to cover up all her red blemishes. She is super sensitive to products and I had to be careful to use mainly non-comedogenic products on her skin. Dinair airbrush is foundation water based so it was a bonus since it doesn't clog pores or cause breakouts.


I thought I did a great job for my two favorite ladies and look forward to performing the same duties for their brother's upcoming nuptials! Some of the key points I would like to point out when considering DIY makeup for a photography heavy day makeup.
1. Don't use moisturizer or foundation with SPF if you plan to be photographed all day. Natural lighting photography won't be an issue but when your friends and family using a point-and-shoot camera with a built it flash, the SPF in the moisturizer/foundation will reflect off the flash and create a whittish-cast on your face. Take a look at your old photos and see if you find this problem.
2. Steer away from a lot of glitter type products for photography. All that glitter will reflect back and make your face look oily. There are certain areas of your face that you will want to hi-light to bring out the high points on your face but I suggest going very light on the hi-lighting product.
3. Do some minor contouring to your forehead, cheekbones, and nose to make your features stand out. Contouring can be as simple as using a darker foundation, darker color concealer, or utilizing nude skin colors eye shadows. In these photos, I utilized a darker airbrush foundation to frame the face and also eyeshadow to contour the nose area.
4. Don't be afraid to go a little bit heavier on the makeup. You may not feel comfortable with so much makeup on but photography tends to wash you out. The heavier makeup application will show up better in pictures. Photos last a lifetime, everyone else won't remember if your makeup looked heavy when the photos turn out awesome.
5. Wear fake eyelashes to enhance your eyes. I also recommend wearing double lashes to create the illusion of bigger eyes. With many asians born with monolids, this can make a big difference and showcase your eyes better.
In general, I really like using the Dinair Airbrush Foundation and is mainly the only machine I have experience with. It's a bit bulky to pack but the foundation does last for a 10-12 hour day, doesn't look cakey on me, and it also doesn't clog my pores. I've been using airbrush foundation on a daily basis, and have noticed an improvement on my face. Besides the clean of the airbrush gun, the foundation application takes me about 2-3 minutes -- not much longer than using a regular liquid foundation. This was an impromptu post so please feel free to message me or leave a comment if you have more questions about airbrush makeup.
No comments:
Post a Comment